GrowMetrics makes it easy to launch and manage your own ads within the matter of a few clicks, you don't need to be an expert! If you are looking for some extra support with crafting an optimised and high performing ads campaign, follow this article.
Before you create your first ad on GrowMetrics, it’s important to verify a couple of things…
Ensure your Facebook page and ad account is connected to GrowMetrics
Ensure your payment method on your Facebook ad account is active, you can find out how to do so here.
If you are running ads to a website, it’s highly recommended to install the Facebook pixel on your site, if you have no idea what a pixel is, you will learn about it in this article.
First, navigate to the Ads Assistant in the side panel, from here, you will land on the campaigns hub page, once you post a live ad, you will be able to view the active campaign, as well as make any changes to it such as budget, or turn it off.
You will also be able to view your campaign results in the Metrics page, to learn more about that you can view this article.
Let’s create your first campaign, by pressing the ‘Create campaign’ button in the top right corner.

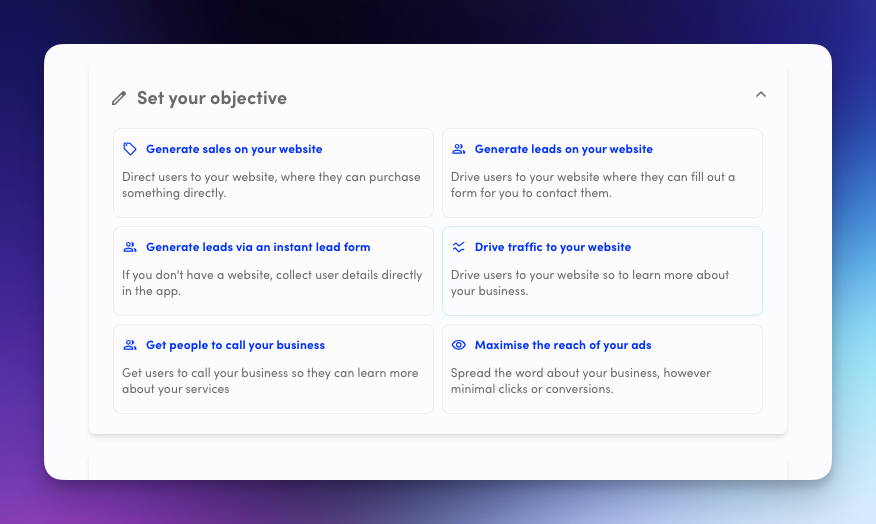
The core foundation to any good campaign, is setting the objective, this tells Meta, what you would like to achieve with your marketing, it’s really important to make sure that you select the precise campaign that lines up directly for your goals.
For example, if you are selling something online, you want to select the ‘Generate sales on your website’ objective. This tells Facebook to look for people who would be interested in buying your items.
Or, if you are a service based business, and you want to get in contact with potential leads, you can choose from the Generate leads from your website, or instant lead form options, depending if you have a website ready to take customer information.
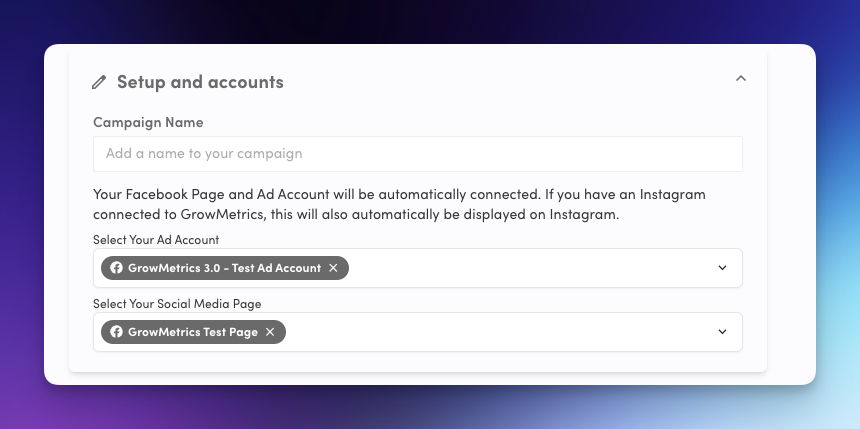
Here is where you can simply give your campaign a name and your Facebook page and Ad account should be automatically connected.
If they are not, it might mean you haven’t connected your social accounts here. Follow this article to connect your social media accounts to GrowMetrics.
If you have an Instagram account connected to GrowMetrics, your ads will also be run on Instagram too, this is still done through Facebook and GrowMetrics optimises your ads to deliver on the best placements.
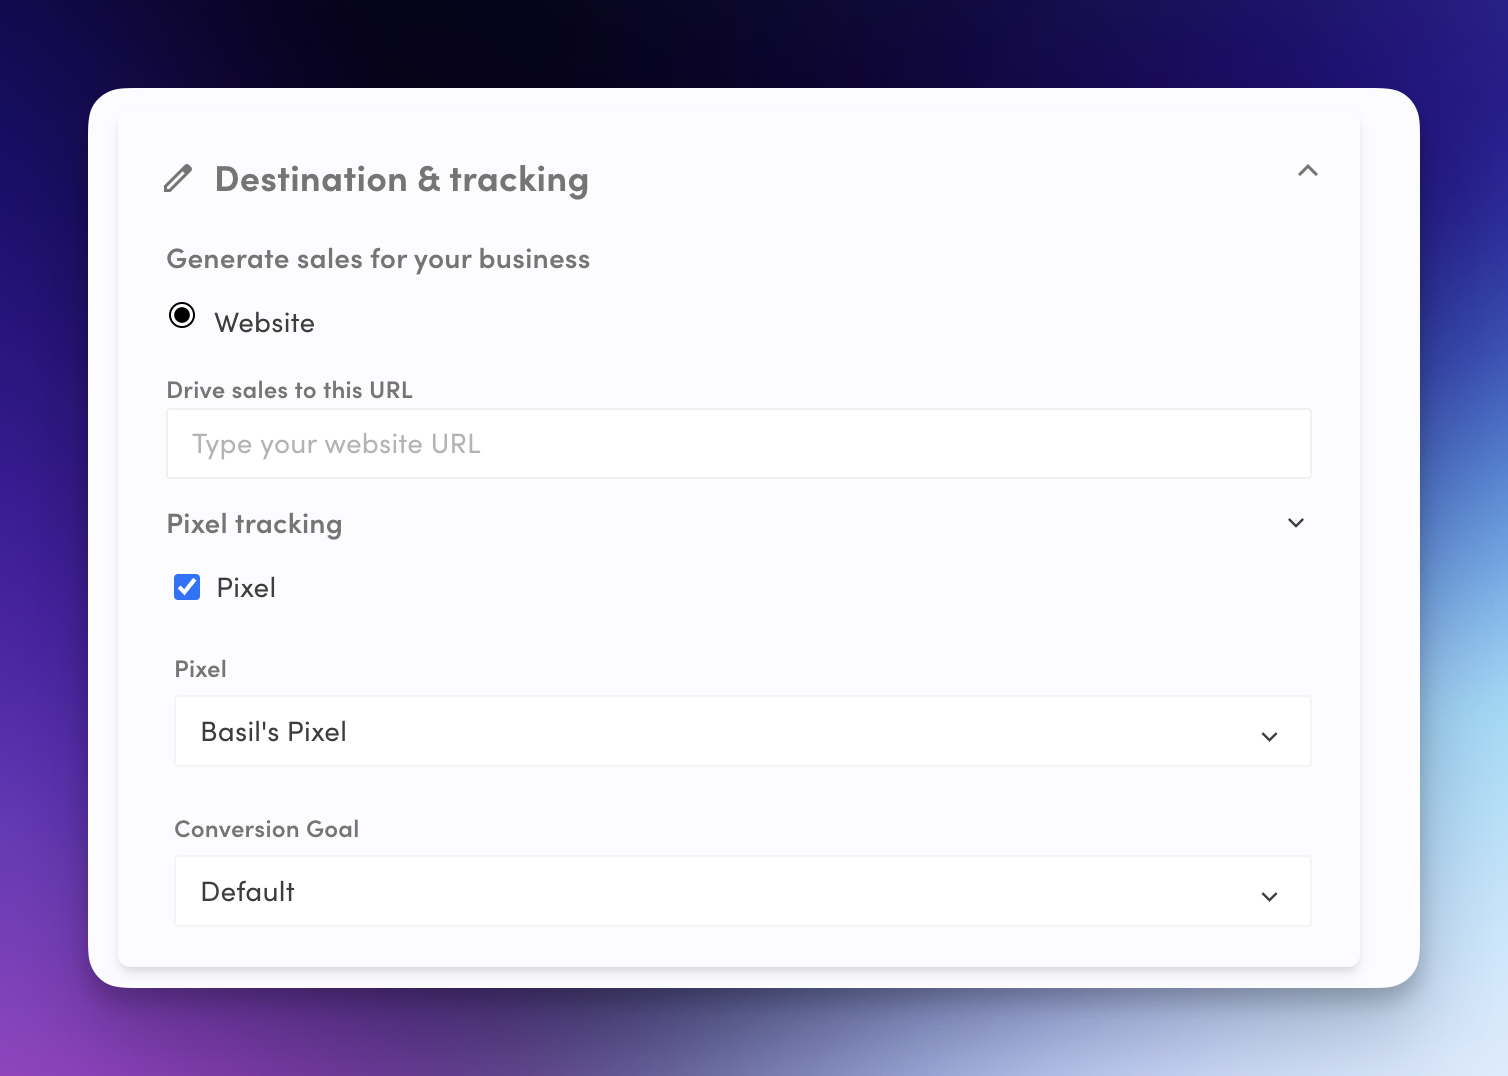
Depending on your campaign objective, you will need to select a location where your traffic will go to. So when you run your ad, the user will click on it and want to learn more about the product or service you are advertising. For best practices on driving your traffic and converting them, read this article.
If you want to run a lead generation campaign, you can choose to drive your traffic to a landing page where they can submit a form, or if you don’t have a landing page set up to capture lead information, you can select generate leads from instant forms which will be a quick form, where you can collect information directly from Facebook.

The Facebook Pixel is a piece of code that you place on your website to track visitors’ actions. It helps you measure ad effectiveness, track conversions, optimise ads, create targeted audiences, and retarget people who have interacted with your website.
If you do have a Facebook pixel, you can connect this at this stage in the campaign creation process. This is crucial as it helps GrowMetrics optimise your ads for more results. Press the pixel tracking dropdown, and connect your Facebook pixel. If you don’t see your Facebook pixel here you can click here for troubleshooting steps.
Lastly, make sure you set the conversion goal that matches the events you set up when you created your pixel, if you don’t know or have one, you can just select default
If you don’t have a Facebook pixel, you can read this article on how to install one on your website, or chat to our friendly experts and we can help you set this up for a fee.
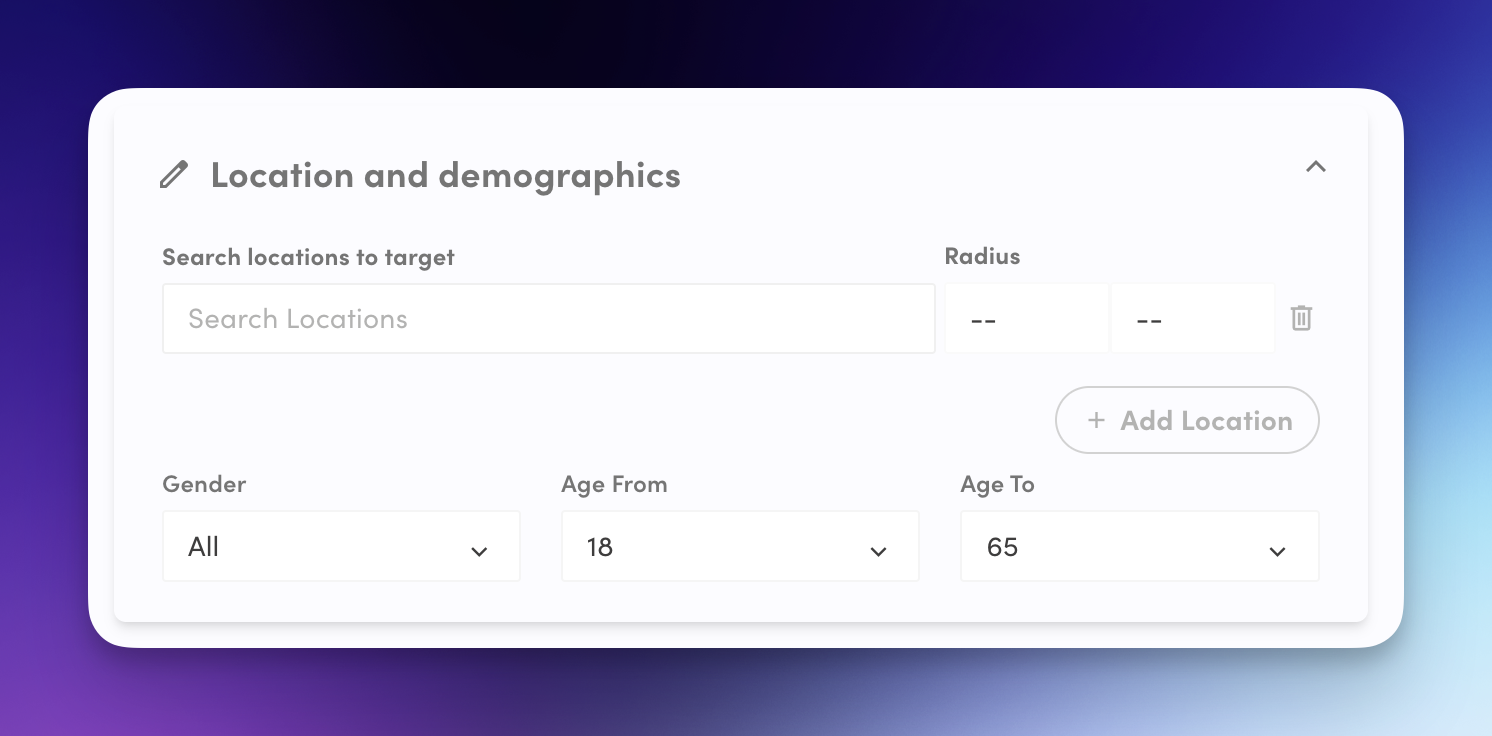
Next, you can add in the desired location you want to track for your campaigns, if you are a brick & mortar business, you can simply enter in your address, and your desired radius you believe people will travel to visit you.
If you can sell from anywhere, you might want to select cities, countries or even continents that you are available in.
Next, you can also add multiple locations by continuing to select the add location button.
You can set customer demographics that you believe will be most interested in your business, but it's important not to be overly restrictive (e.g., targeting females aged 20-25 in South Yarra, Victoria). Such narrow targeting results in a very small audience, which limits Facebook's ability to participate in more ad auctions, ultimately making it more expensive when your ad does appear. Instead, keep your targeting relatively broad, allowing Facebook's algorithms to use the data you provide to accurately identify your ideal customers.
Lastly, you will see your targeting locations appear on the map to the right, and below that you will also see an estimated audience, with a status on whether it’s a strong or weak audience, use this to refine your targeting.
Now the fun part, creating an ad that will not only generate you lots of conversions, but one that will give you sustainable growth, we’re about to expose some industry secrets here, so read along very closely.
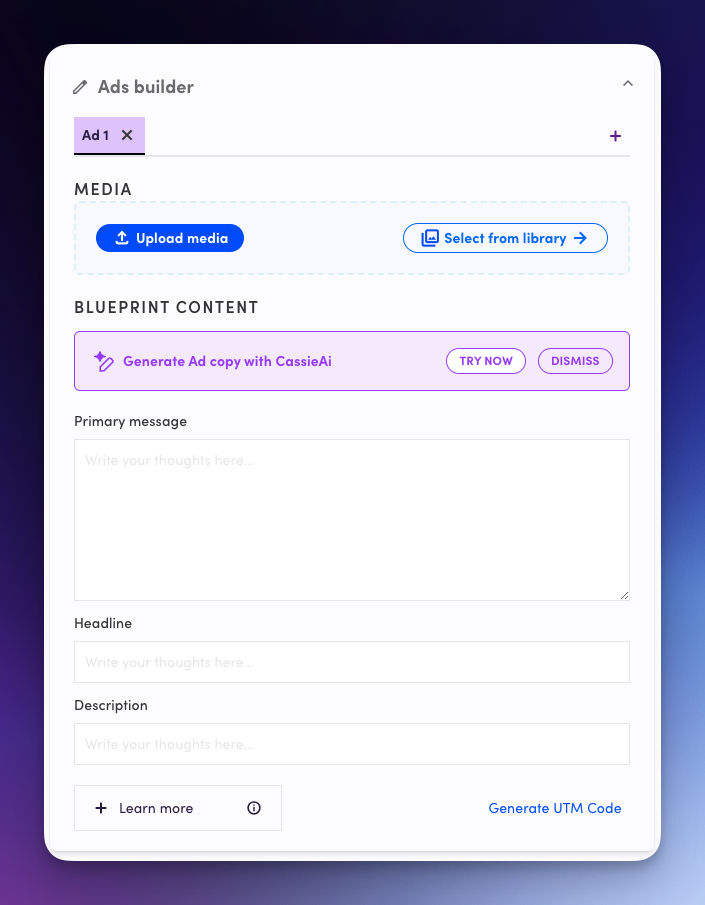
In order to give your campaigns flexibility, it’s recommended to create multiple ads inside of your Facebook campaign. This can be done by pressing the + button next to the ads section.
Why create multiple ads?
When you create a campaign, and only create one ad for that campaign, this means you only spread one message, you want flexibility and making multiple ads with different variations, this helps you optimise your ads. Multiple photos and multiple videos means you can run experiments and analyse which messaging converts to your audience the best, this helps you double down on what works over time.
To attach a photo or video, you can upload one from your device or from your Drive. As you start to create your ad, you will start to see a preview on the right hand side.
A good creative, is the most important aspect of a Facebook campaign, however in this article we uncover some of the industry secrets to curating a high-converting Facebook ad.
Use High-Quality Images or Videos: Ensure your visuals are clear, high-resolution, and professionally presented. Low-quality or pixelated images can make your ad look untrustworthy and may turn people away.
Focus on Your Product or Offer: Your ad creative should make it immediately obvious what you’re promoting. Avoid clutter and distractions by featuring your product, service, or offer as the central element. This helps viewers understand your message quickly.
Incorporate Bright Colours and Contrast: Use colours that stand out in the Facebook feed to catch attention. Bright colours and contrasting backgrounds help your ad stand out from the rest of the content users see as they scroll through their feed.
Include a Clear Call to Action (CTA) in Your Creative: If possible, add a CTA directly within your image or video, such as “Shop Now,” “Learn More,” or “Sign Up Today.” This reinforces the action you want users to take and works in tandem with your ad copy.
Keep Videos Short and Engaging: For video ads, aim to keep them under 15 seconds to maintain attention. Capture interest within the first 3 seconds with an eye-catching start, and make sure your message is clear even without sound, as many people watch videos on Facebook with the sound off.
Test Different Creative Formats: Facebook offers a variety of ad formats, such as carousel ads, single images, videos, and slideshows. Experiment with different formats to see which ones resonate best with your audience. Carousels, for example, are great for showcasing multiple products or features.
Use Text Sparingly on Images: Facebook recommends using minimal text on your ad creative, as too much text can reduce its performance. Instead, let your image or video do most of the talking, and use your ad copy to provide additional details.
Show Real People Using Your Product: Ads that feature real people using your product or service tend to feel more authentic and relatable. User-generated content or lifestyle images often perform well because they help potential customers visualise themselves using your product.
Test Different Creatives Regularly: Regularly test multiple versions of your creatives to find out what works best. Change up colours, images, formats, or styles to discover which ones lead to higher engagement or conversions.
To support your ad creative, you need to write copy that will entice people to take action, however don’t worry, you don’t need to be an expert copywriter to write copy that converts.
Every Facebook ad comprises of Primary Text, Headline and Description.
The Primary Text is the main section of your ad copy and appears above your ad creative. It’s usually the first thing people see, so it needs to grab attention and quickly communicate your message. This is where you can explain what your ad is about, introduce your product or service, and highlight any key benefits. It’s best to keep this text clear, concise, and to the point, as people often skim through ads. Aim to start with a hook, such as a question or statement that relates to your target audience’s pain points or interests.
The Headline is the bold text that appears directly under your ad image or video. It’s meant to capture attention and tell viewers what your ad is about in a single sentence. Your headline should be short and compelling, as it’s often what people look at first when deciding whether to read more. Focus on the main benefit of your product or service, or use it to create a sense of urgency, like “Limited Time Offer” or “50% Off Today Only.”
The Description is a smaller piece of text that appears under your headline. It provides a little extra detail about your offer, product, or service. It’s optional, but it can be used to reinforce your headline or add more context, like explaining your product features, pricing, or any additional benefits. Keep it brief, as it might not always show up depending on the ad placement.
Know Your Audience: Tailor your copy to speak directly to your target audience’s needs, desires, and pain points. Use language they relate to, and address their specific challenges or goals.
Focus on Benefits, Not Just Features: Highlight how your product or service will improve your audience’s life. Instead of just listing features, explain the value they’ll get, such as saving time, money, or achieving a desired result.
Keep It Simple and Clear: Avoid complicated language or jargon. Your copy should be easy to understand, even at a glance. Use short sentences and break up the text into digestible parts.
Use a Strong Call to Action (CTA): Tell your audience exactly what you want them to do, like “Shop Now,” “Learn More,” or “Sign Up Today.” A clear CTA encourages people to take the next step.
Create a Sense of Urgency: Encourage action by using phrases like “Limited Time Offer,” “Only a Few Left,” or “Don’t Miss Out.” This helps prompt people to take action quickly instead of putting it off.
Test Different Copy Variations: Don’t be afraid to test different versions of your copy to see what works best. Try different headlines, CTAs, and primary texts to find the combination that drives the most results.
Call-to-action (CTA) buttons in Facebook ads are clickable buttons that guide your audience towards a specific action you want them to take, such as "Shop Now," "Learn More," "Sign Up," or "Contact Us." These buttons make it clear what the next step is and help encourage people to interact with your ad in the way you want, whether it’s visiting your website, signing up for a newsletter, or making a purchase.
UTM parameters are little tags you add to the end of a website link to help you see where your visitors are coming from. They let you track which ads, emails, or social media posts are sending people to your site. For example, you might add "utm_facebook" to show if the visitor came from Facebook, "utm_adscampaign" to say it was from an ad, and "utm_campaignname" to track the specific campaign name. This helps you see what’s working best in your marketing.
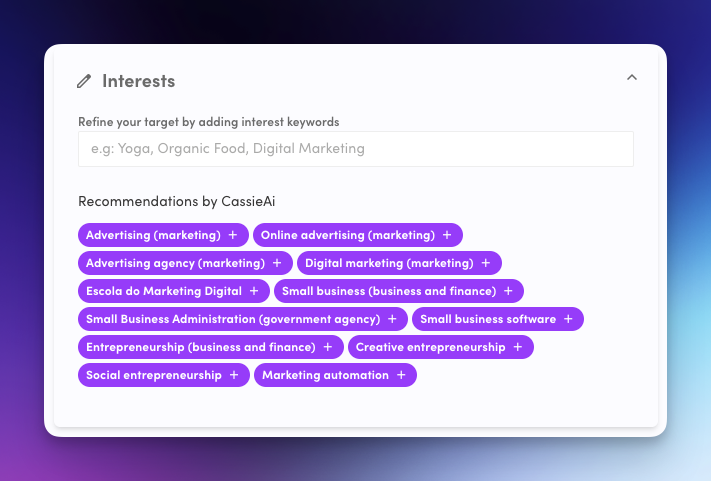
You can refine your audience by their interests, if you know what your target customer interests are, you can add them here by simply typing them in.
You can also make use of audience suggestions by CassieAI.
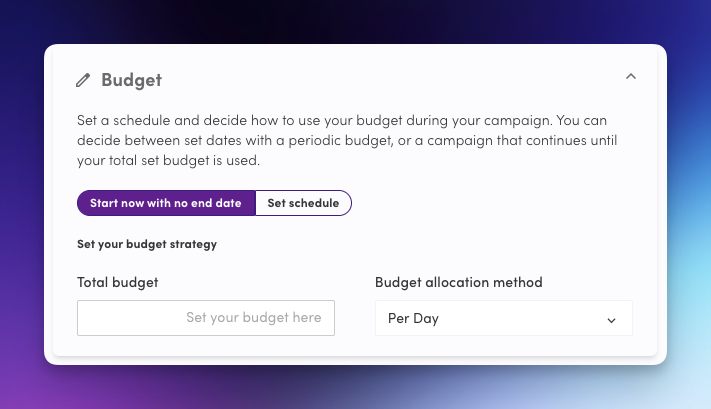
If you’re new to advertising, consider starting with a modest budget, and gradually increasing as you gain more data and insights from your campaign performance. Consistency is key, so pick an amount you can commit to over several weeks, allowing your campaign to build momentum and gather accurate data for future optimisations.
To set your budget, you can either choose to spend a certain amount per day, or set a start and end date by clicking set schedule and change the budget allocation method to lifetime spend and you can choose a set amount you would like to spend that period.
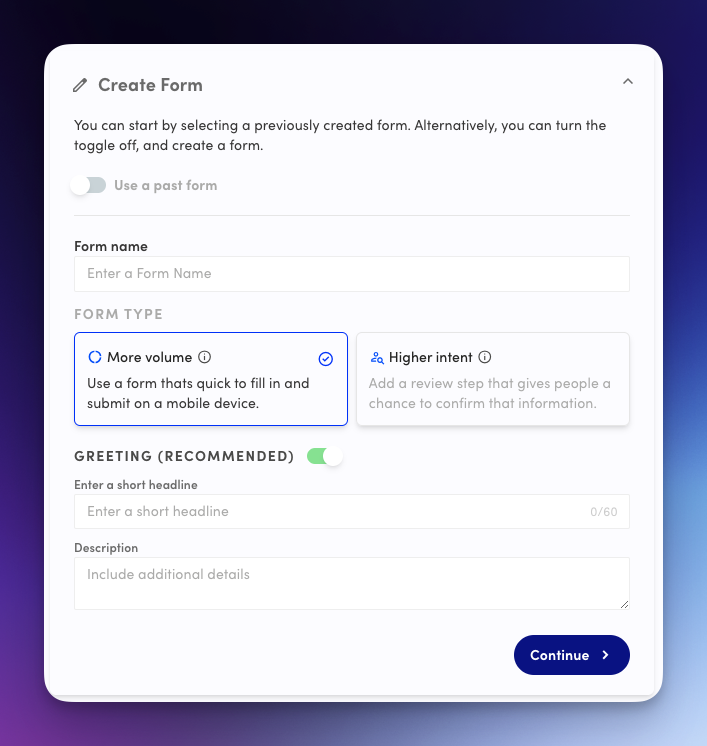
If you chose to generate your leads through an instant lead form, this will mean you have to create a lead form that you will drive your users to, instead of your website.
You can choose from an existing form, or toggle off the switch and create a form from scratch.
To learn more about creating an effective Facebook Lead Form, check out this article.
Your campaign is now ready to launch! Click "Review Ad" to double-check all your settings, then hit "Publish" to set your ad live. Congratulations on reaching this stage – now sit back and monitor as your ad begins to reach your target audience and drive results.
Wondering whats next?
Explore more of our articles to guide you on your path to marketing success.
How to Create a Facebook Lead Form
An introduction to Faceboook Lead Forms and how to leverage them to explode your lead generation campaigns.